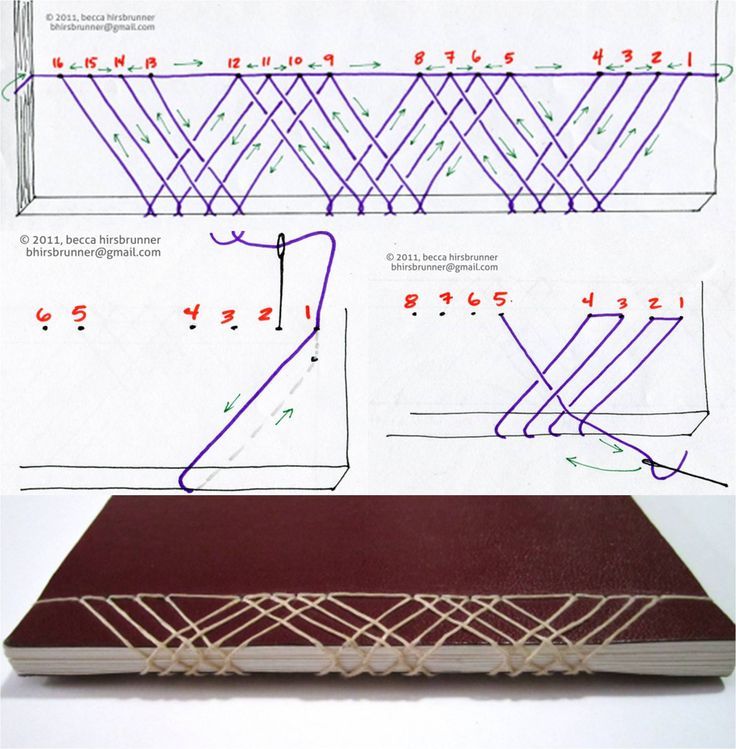
Kat Dietz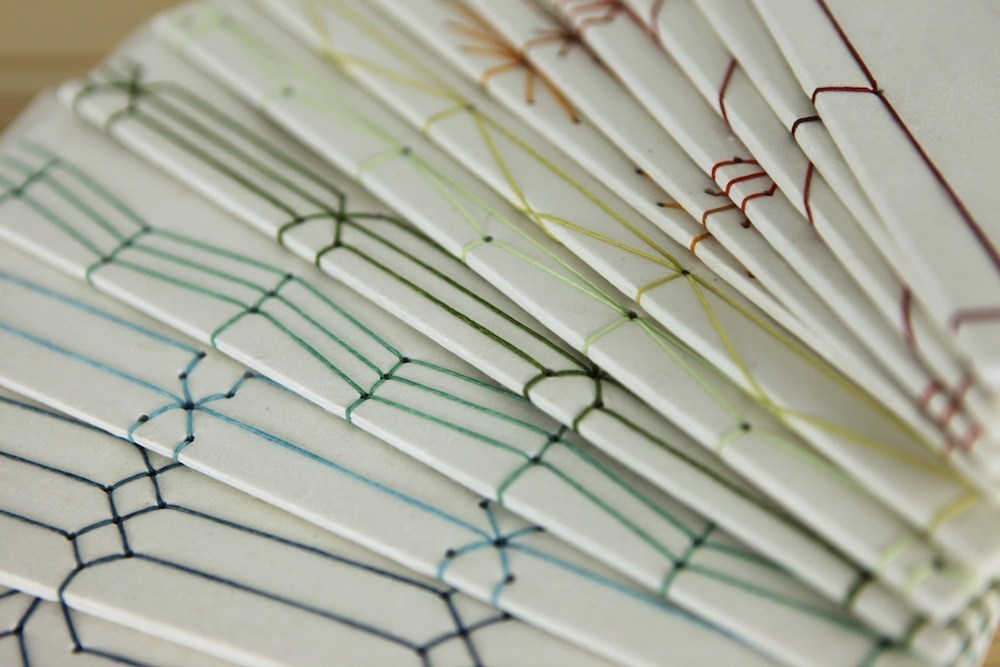 Most western bookmaking styles originate from Egypt such as the Coptic stitch, but in the more eastern part of the world, styles are more linked with India. “Religious sutras were copied onto palm leaves, which were split down the middle, dried, and rubbed with ink. These finished leaves were numbered and bound with twine” (Masters). This and the Buddhist development of the accordion style for their sutras all influenced the design of Japanese Stab Binding, an ancient and traditional technique still used today. Japan is the most known version of this technique known as Yotsume Toji [四つ目綴じ], “which roughly translates to ‘four holes’” (blog.paperblanks.com). During the Tokugawa / Edo period (1603-1867), the form Yotsume Toji [四つ目綴じ] became widely used after the system of book trading was established. “Practised in China early as the Tang period, widespread by the Ming dynasty period (1368-1644), and transmitted to Japan in the Muromachi period (1392-1573), by end of which, in the late 16th century, it had become the standard form for printed books.” Pages were designed to have printed or handwritten text on only one side and placed on top of eachother. The assembled pages were then sewn together, its “stitches passing through the blank margins next to the loose edges, so the sewn edges form the spine and folds form the edges of pages. This stringbound style continued through the Meiji period.” (bookbindersmuseum.org) The technique is fairly simple, but it can get more complex depending on the design aesthetic desired. A tutorial video is below of the basic technique:
while others decorate the edge with intricate patterns which require more holes. Yotsume Toji (Four-Hole Binding), as previously mentioned, is the most common and straightforward style known for its Japanese origin, but there are other types known as Koki Toji (Noble Binding), Asa-No-Ha Toji (Hemp Leaf Binding), and Kikko Toji (Tortoise Shell Binding). Koki Toji is a “Chinese variant, also known as Kangxi, which has two extra holes near the corners for additional strength and decoration.” Asa-No-Ha Toji is “a variation of Kangxi with more holes, including corner stitching, creating a more elaborate and durable binding” as shown in the images to the right . Lastly, Kikko Toji is “similar to Asa-No-Ha Toji, without stitching around the corners” (blog.paperblanks.com).
I find this technique quite lovely and simple to do. I understand why it is so popular in scrapbooking and photo albums. For me, this topic is fascinating because of my love of Japanese culture. Since taking this class on book arts, I began to wonder how the development of book styles were affected by location. Plus, I love the intricate and ornate designs of open spine books like the Coptic stitch. ___________________________________________________________________________________ Works Cited http://blog.paperblanks.com/2016/02/stab-binding-5-things-to-know-about-this-classic-bookbinding-technique/ https://bookbindersmuseum.org/japanese-bookbinding/ https://blog.bookstellyouwhy.com/bid/230074/a-quick-history-of-book-binding https://eastern-old-books.com/about-a-wasoubon/ Sam Fresquez Cyanotypes were invented in 1842 by astronomer, photographer and chemist John Hershel. It was said that he “could have invented photography” if he had bothered to. A majority of the photo processes used during this time were silver based processes, the cyanotype however is not. The process uses a mix of Ammonium Iron Citrate and potassium ferricyanide to create a photosensitive solution that can be applied to anything capable of absorbing it. Then exposing this to ultraviolet light with a negative image with create a positive image, after this exposure the object will need to be washed with water. Anna Atkins is credited as the first person to ever make photo books when using cyanotypes to document botanicals entitled British Algae Vol.1. She is also most likely the first woman to ever make a photograph. She was born in 1799, and is recognized as important to both the history of botany as well as photography. In the 1840s the process is rarely used outside of botanicals. Cyanotypes later started to be used by engineers and architects to make blueprints. Before the cyanotype these sketches were copied by hand. In the mid 20th century, zenographic prints finally replaced blueprints, and now digital prints have become most common. I became interested in this process because of the artist Annie Lopez Rogers who is also based in Phoenix. Her family has been in Arizona since 1871, and like my family, her’s was a part of the population who the border crossed over after the Mexican American war. Her work focuses a lot on that and the history of Mexicans in Phoenix. She oftentimes uses cyanotypes on tamale wrapping paper. After SB1070 she constructed a both men and women's underwear out of cyanotypes made from her birth certificate and other documents from her childhood entitled I’ll Show You My Papers If You Show Me Yours. I expected that I would find a large amount of contemporary artists who use cyanotypes in their work, but I had a hard time finding any others. I brought this up to photography students, who said that it is hard to use cyanotypes without being overly nostalgic or romanticizing a different time.I find myself agreeing with this, but I think that Annie Rogers uses the process in a way that is aware of the effect that the process carries with it. I think then when we’re talking about the darker parts of our history that it can be smart to use a medium with a nostalgic tie to it. It reminds me a bit of Mia Adams’ current work, where she tends to use almost over patriotic language and symbols to point towards the history of the United States. 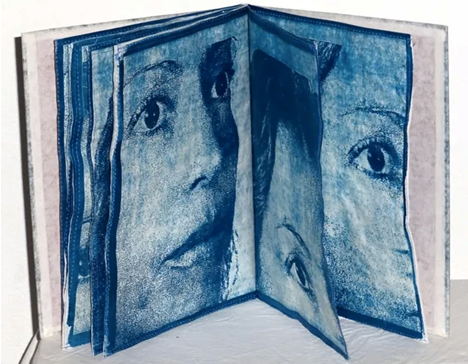 Annie Lopez Rogers 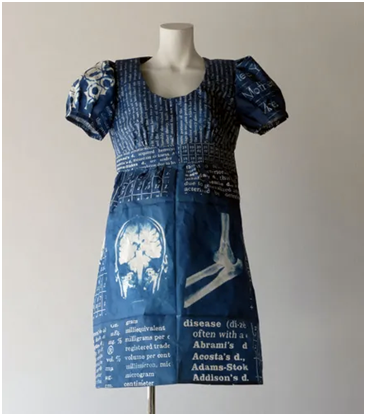 Annie Lopez Rogers 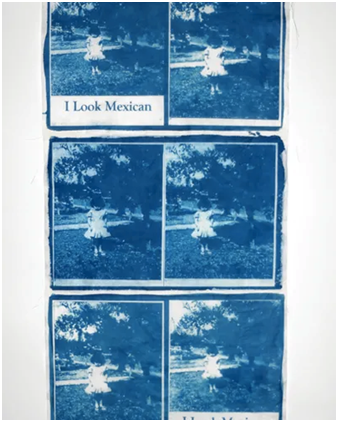 Annie Lopez Rogers 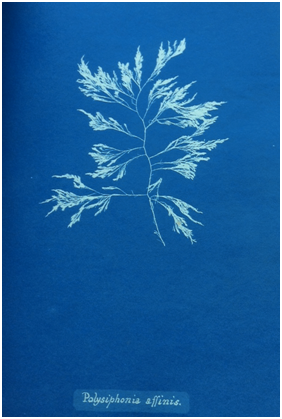 Anna Atkins
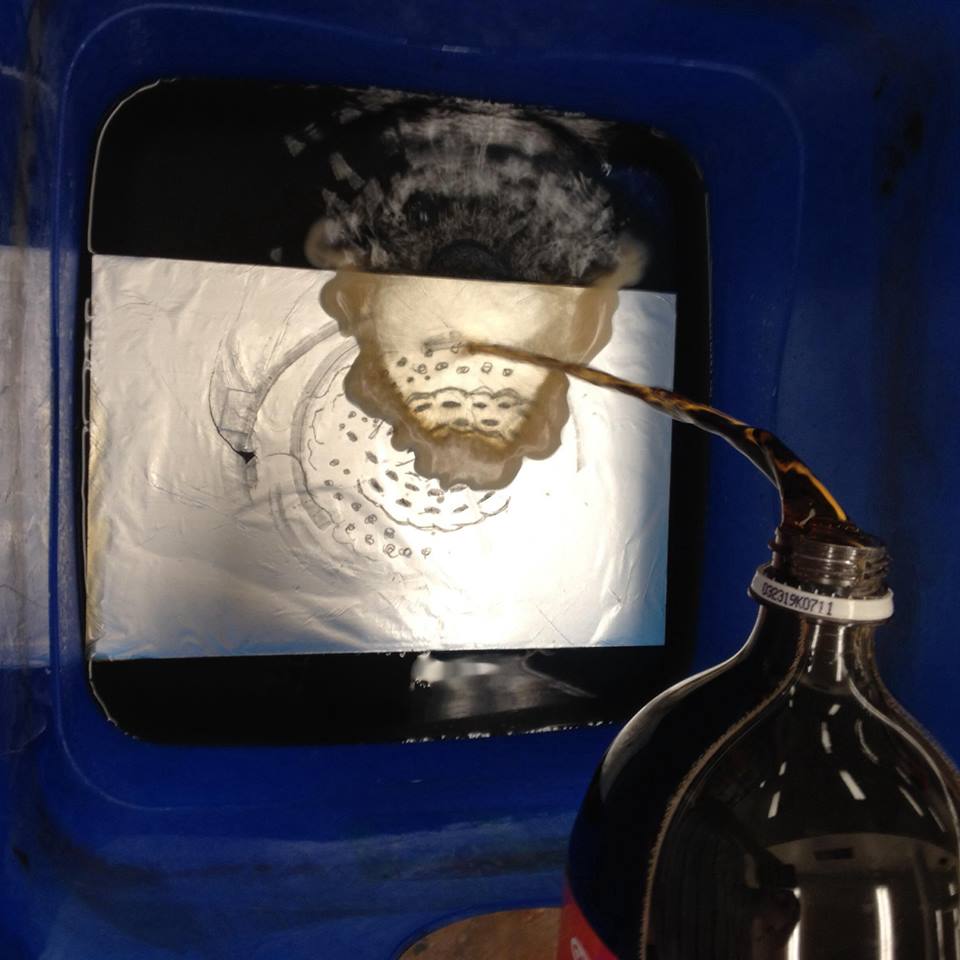
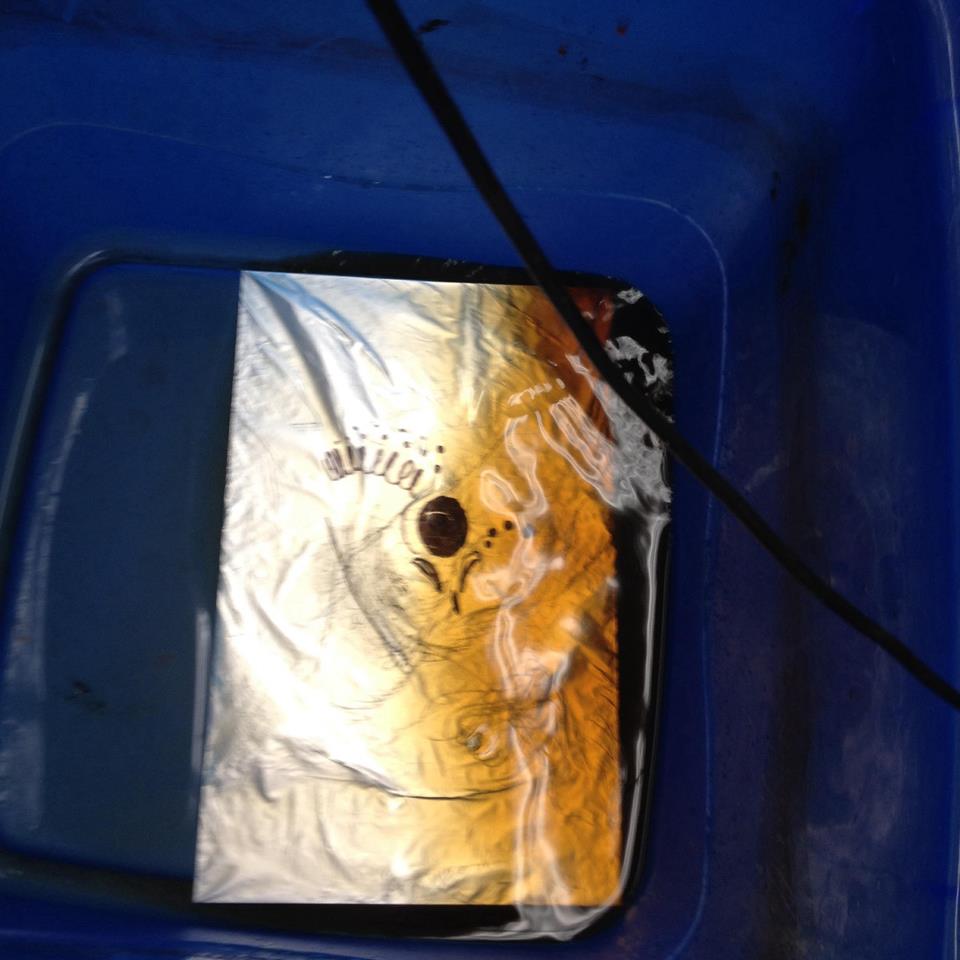
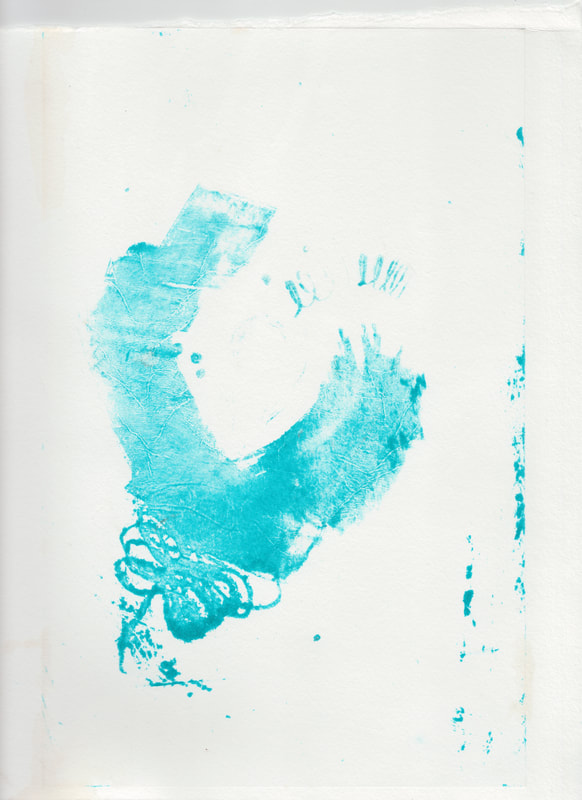
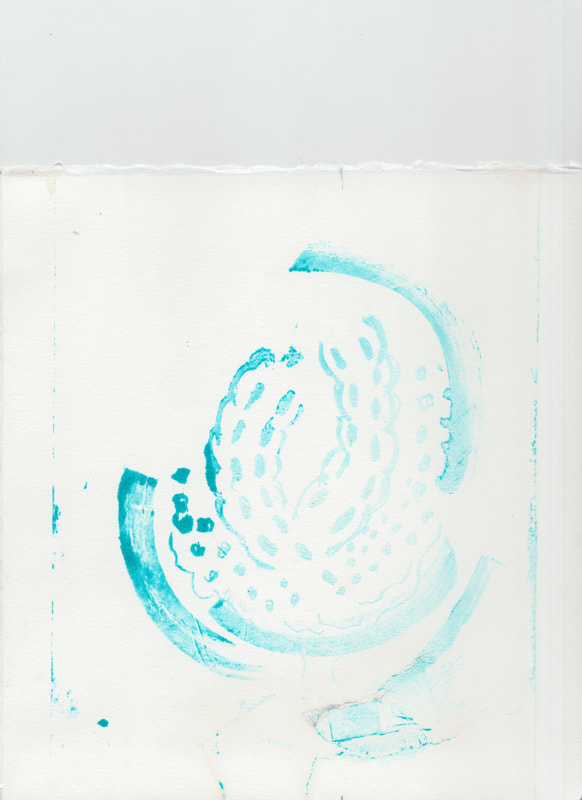
Hannah Whitaker Traditional stone lithography is a process of etching and pulling prints off of limestone slabs. The nature of this technique requires many chemicals and special equipment. As a result, this process is expensive and difficult to gain access to. In June 2011, french artist and teacher Émilie Aizier, pseudonym Emilion, invented a non toxic, home alternative to traditional stone lithography and coined the term Kitchen Lithography. The process sticks to the same general science of lithography however it substitutes vegetable oil for lithotine and cola for nitric acid. Through combining Emilie Aizer's research and kitchen lithography demonstrations from different parts of the world I was able to combine steps from each artist's techniques to further develop this non-toxic and accessible lithography process. * Images used in this tutorial are combined from several print attempts, as a result the key image may change form one photo to the next but that is not part of the process. 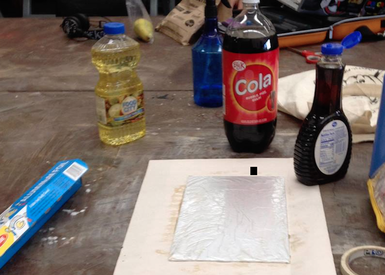 The materials you will need: Aluminum Foil Tape Mono Printing Plate (plexi glass) Cola Pancake Syrup Vegetable Oil A container larger than your plate with no holes Sponge/ Bowl of water Litho Crayons or Sharpie Oil Based Ink Brayer Paper Towels Paper (for print) The First Step: Creating your surface Wrap your mono printing plate in aluminum foil (matte side up) and carefully tape it down to the back of the plate * You must be careful not to leave finger prints on the plate as the grease from your hands may print. * For a smooth surface you can lightly dampen the plate with your sponge before putting down your foil. The water will help the foil cling to the plate and help prevent wrinkles. (However, if wrinkles do not bother you they can also be used aesthetically.) 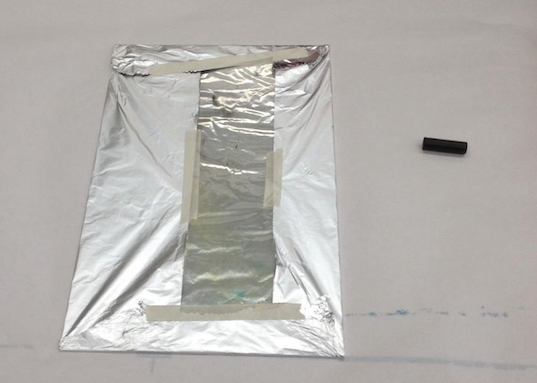 Second: Draw your image With a litho crayon or a traditional sharpie draw your image on the MATTE side of the aluminum plate. *If drawing in sharpie you must draw over your lines at least three times or they will not print. *Try to maintain a light hand as the foil rips easily * If a rip occurs you can seal it with tape however the edge of the tape will print (DO NOT LEAVE THE HOLE OPEN) 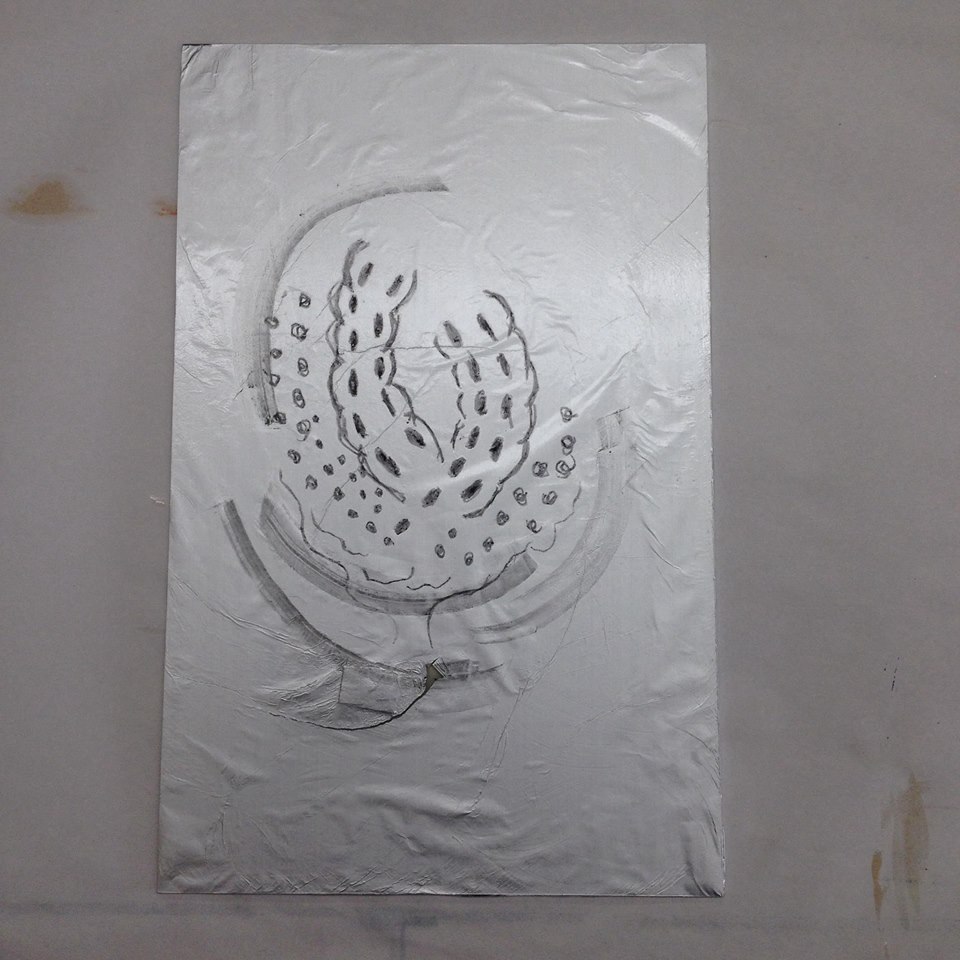 Third: "Gum" your plate Drop a small amount of pancake syrup onto your plate and buff it in with paper towels or cheese cloth. * Make sure there is enough syrup so that it fully and evenly covers the plate Fourth: Etch your plate Get your container and put your plate at the bottom. A this point you should start to pour cola into the container being sure that it hits every inch of your plate. Lift the container and move the liquid left to right for at least three minutes to ensure a complete etch. * If your image is drawn with sharpie you will need to do this process twice. * You cannot reuse this cola and the cola must be carbonated. Fifth: LAW with vegetable oil This is the last step before printing. With cheese cloth or paper towels rub vegetable oil all over the plate. When you do this your image will disappear but thats okay, the grease etch remains. Printing: Wet your plate with the sponge. It is important that you sponge your plate between each application of ink. You want water to be on your plate but you don't want it to be very wet. After sponging roll your oil based ink out onto the plate and watch your image re-appear. Once you've got your pressure set at the press run your plate through with a sheet of paper and pull your print! Researchers say that these plates can be used for up to editions of 50 if using a gentle hand however I have not tested this personally. 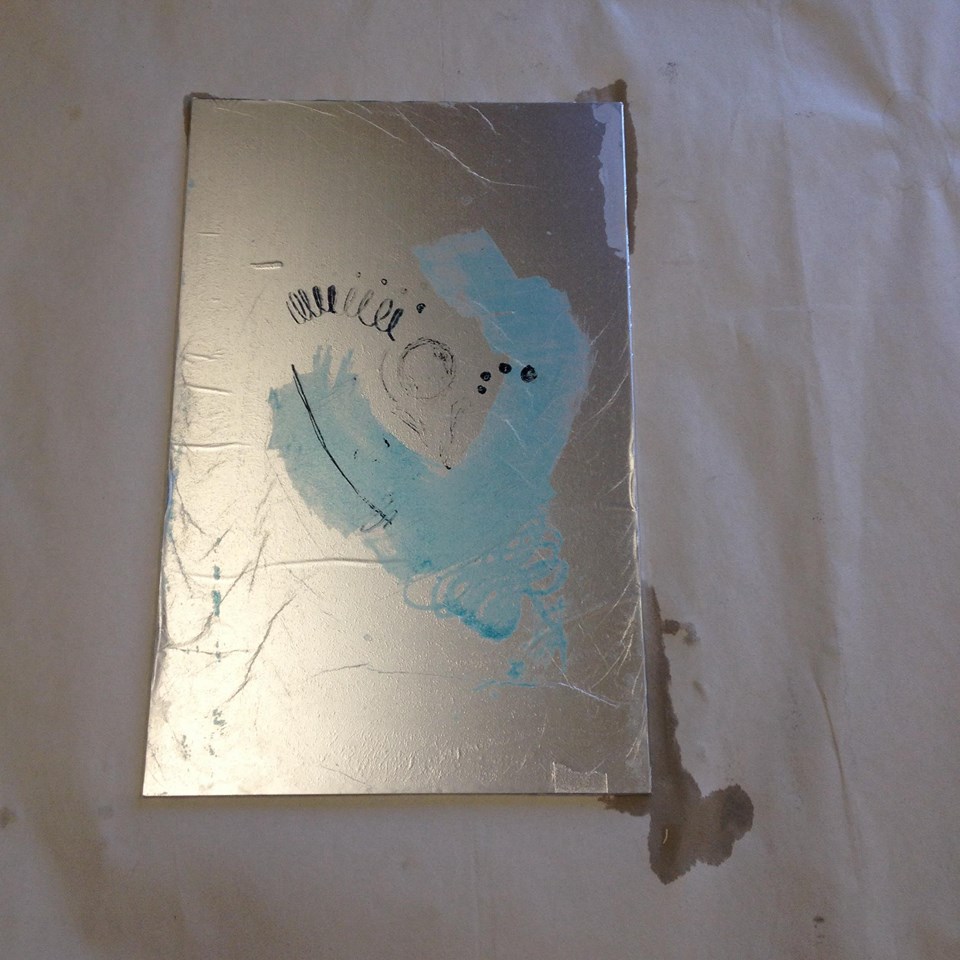 A Pulled PrintLearning Experiences "Flops"ReferencesWithin papermaking there is a lot of equipment – you got your vats, your molds, deckles, buckets, hoses, presses, dryer boxes, blotters, etc, etc, etc. But above all the beater is king. Without someway to break down the fiber you got nothing. After all most of the items are pretty common place. Take some water, a blender two old picture frames and some old window screen and you can pretty much make paper. Problem is that it will be kind of lump and bumpy, not hold up real well, be hard to write or draw on, and generally not perform for anything than being able to view it as a piece of paper that you made. Begging question – if it doesn’t function the way we ask paper to function than is it really even paper? Regards of its paperness we must look at the reason why. The reason paper turn out so poorly when made using a is because the paper that comes from a blender is chopped while the paper that comes from a beater is macerated. The action of macerating elongates the fibers allowing them to flow together creating a strong woven hydrogen bond while also being able to compress down into a flat even sheet, and the way to do this is with a beater. Since around 1673CE (Library of Congress) western papermaking has been reliant on the design of one tool for its papermaking – The Hollander Beater. This oval trough with a cogged wheel and a bed plates does a fantastic job on macerating fibers of all kinds. The issue with it is accessibility. The market for these machines is pretty limited and they are built to last so new Hollander Beaters are made to order and run you somewhere in the ballpark of $10,000. That right there is a pretty heafty sum of money to come up with on the front of starting a new papermaking studio, and to my mind is the main prevention of papermaking expanding within the arts. I became interested because it would seem to me that in the age of the Do-it-Yourself movement, wiki-how and youtube fix it videos, we could come up with a solution to this problem. I got to wondering if papermaking has been around since 105 CE (Asunción 9) but the Hollander Beater didn’t come on the scene until around 1673CE how was the paper being beaten for for other 1500 year? Maybe this could be a clue into how to make a beater that is more affordable and still produces the same product. Here you will find a survey of different paper beating machines and methods. Hand Beating – In the beginning there was hand beating. The Chinese made paper from rags, finishing nets, mulberry tree bark, nettles, and hemp that were softened with lime and fermented before crushing and grinding them by hand to a pulp using a hand mortar. (Asunción 14) Though a very early and possibly considered rough, primitive method some of the most beautiful papers are still made today using a similar process. For many fibers like Kozo or Gampii a cooking in caustic solution followed by a hand beating with mallets or wooden paddles is used. From afar someone seeing the rhythmic beating of wet pulp with a piece of wood may even seem slightly barbaric. However, after the suspending in water and pulling a sheet it creates some of the must beautiful and delicate paper often with slight wispy hairs suspended within. Japanese Stamper – Not surprisingly following hand paper beating came a tool that would beat paper in a similar way but without the laborious work. Though in Japanese papermaking the beating is really secondary to the preparation of the fiber in the cooking and washing stages. “Fiber selection, cooking and washing are the most crucial preparatory steps in Japanese papermaking” “Minor variations in cooking and washing can produce very different papers even from the same fiber” (Barrett 35) While there are many variations based on area, mill and the papermaker the general process is “boiling the fiber in a strong alkali solution to dissolve most of the lignin, pectin, waxes, and gums, leaving primarily cellulose fiber and hemicelluloses.” (Barrett 36) After that the fiber is put into clean water and meticulously inspected – picking out and removing small bits of left over bark or imperfections until the fiber is a consistent tone. Following the cleaning the fiber is ready to be beaten. “The fiber is twisted into thread and woven into tight patches of cloth” “millions of long straight fibers, all laying closely together” “The fibers stand loosely together in the bark…ready to come apart” (Barrett 44) after this the fiber is beaten for only around 30 minutes. The beater itself was invented in “1920’s to substitute for hand beating” (Barrett 46) The stamper beater consists of a metal shaft with a hardwood striker mounted to the bottom, that can travel freely vertically as well as rotates. It is bolted into a sturdy wooden frame and powered by an electric motor that when running raises and lowers the striking part of the machine into a small basin at the bottom where the fiber is kept. For final processing a Naginata beater is often used (Barrett 46) 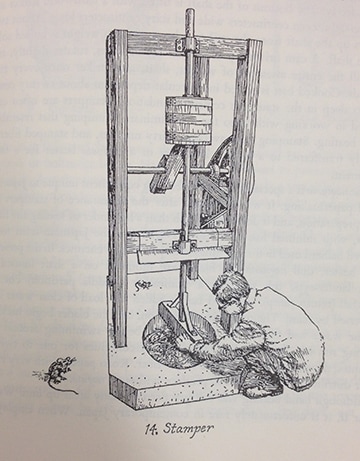 Naginata Beater – The Naginata beater came on the scene after the invention of the stamping beater. In the use of the stamper the purpose is not to chop, cut or macerate the fiber. The goal is rather to separate the fibers from each other. After stamping the fiber is put into the Naginata to “tease” the fibers apart. The Naginata looks very much like a western Hollander beater, an ovular trough with a mechanical apparatus that the fiber and water passes through. Unlike the the Hollander the roll and the bedplate have been removed. In there place is a series of curved dull knife like thanes attached to a rotating horizontal shaft and powered by an electric motor. These curved “blades” are what gives the Naginata its name, originally coming from the the name for the curved halberd used in battle. While the Naginata is running for about 20 minutes or so depending on the fiber the dull blades chop at the water and fiber freeing the strands of fiber from each other and separated them from each other – suspended in the water and ready for sheet forming (Barrett) 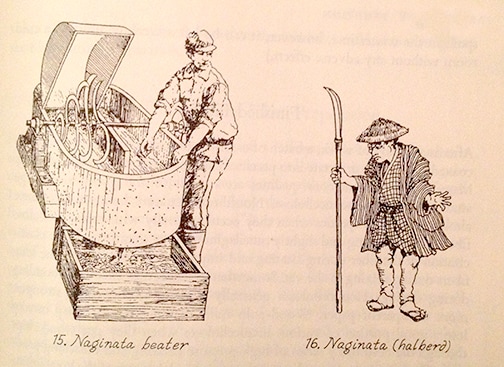 Western Stamper – Before the invention of the Hollander beater in the western world the use of the western style paper stamper was the main tool of the papermaking industry. The stamper normally consisted of 3 or more hammer like heads that would land their blow inside of a rounded bottom stone trough. Often metal was used at the bottom of the trough to increase longevity. The head of the hammer that came in contact with the bottom of the trough would be outfitted with a gridding of nails or sometimes a custom cast plate or head – similar in appearance to the bed plate of a Hollander beater. The arm of the hammer attached to a pivot point that would allow the hammer to raise and fall. The force causing the raising and falling of the hammer was powered by a rotating shaft outfitted with pegs interspersed so that the hammers would raise and fall in separate timing from each other. This shaft would often be powered by water and a mill running alongside of the building the beater was housed in. Prior to beating rags, where were the primary source of paper, was cooked or most often retted (rotted). The fiber was then poured into the trough and processed –typically taking around 3-5 days. “The behavior of the pulp under the hammers perfectly fits the various descriptions made in the 18th century. When a hammer is raised, it creates a depression which draws in the pulp expelled by the drop of the neighboring hammer.” (Moulin à papier) 601 Production LTD, Traditional Paper Making Process, https://www.youtube.com/watch?v=lltkdyE1OG0, May 25, 2012
Asunción, Josep. The Complete Book of Papermaking. Lark Books, 2003 Avi Michael, Chancery Papermaking, https://www.youtube.com/watch?v=e-PmfdV_cZU, May 28, 2003 Barrett, T., “European Papermaking Techniques 1300–1800.” Paper through Time: Nondestructive Analysis of 14th- through 19th-Century Papers. The University of Iowa. Last modified July 14, 2014. http://paper.lib.uiowa.edu /european.php. Barrett, Timothy. Japanese Papermaking. John Weatherhill Inc., 1983 Library of Congress. Papermaking Art and Craft. Vinmar Lithography Company, 1968 Moulin à papier. http://www.moulinduverger.com/papier-main/article-42.php. 2006 sararingler, Kozo Beating, https://www.youtube.com/watch?v=AgXZLkwJqZ0, July 16, 2009 stampochpress, Handmade papermaking and handcasting type, https://www.youtube.com/watch?v=7MTb7Nt9jNY, November 7, 2007 |